
Classic white sourdough loaf, step by step
12 min read

This is the recipe most home bakers learn first. A single 800g white loaf at 72% hydration, with a 20% starter. It is forgiving, the timing fits a normal home schedule, and the crumb is open enough to look impressive without being awkward to handle.
Ingredients (one 800g loaf)
Weights worked out for a 72% hydration loaf using 80g of fed starter. To scale, use the calculator.
- White bread flour437 g
- Water275 g
- Active starter80 g
- Salt9 g
Need a different size? Plug your numbers into the calculator.
The method
1. Mix and autolyse (30 to 60 minutes)
In a large bowl, combine the flour and most of the water (hold back about 20g). Mix with a spoon or your hand until no dry flour remains. The dough will look shaggy. Cover and leave to rest for 30 to 60 minutes. This is called autolyse: the flour absorbs the water and gluten begins to form on its own, so you have to do less kneading later.
2. Add starter and salt (5 minutes)
Pour your fed, active starter on top, sprinkle the salt over it, and pour the remaining water on top. Pinch and squeeze the dough together to mix everything in evenly. It will look messy at first; keep going until it comes together.
3. Bulk fermentation (4 to 6 hours)
Cover the bowl and leave at room temperature, around 20 to 22°C. Every 30 minutes for the first 2 hours, do a set of stretch and folds: wet your hand, grab one side of the dough, stretch it up and over to the other side. Rotate the bowl a quarter turn and repeat 4 times. Then leave it alone for the rest of bulk. The dough is done when it has risen by 50 to 75%, looks smooth and domed, and has visible bubbles on the surface and sides.
4. Shape (5 minutes)
Tip the dough onto a lightly floured surface. Fold it in on itself a few times to build tension, then roll it into a tight ball, seam-side down. Let it rest for 10 minutes, then shape again into your final form: a round boule or an oval batard.
5. Cold proof (8 to 16 hours, usually overnight)
Place the shaped dough seam-side up in a banneton or a bowl lined with a floured tea towel. Cover and refrigerate overnight. The cold slows fermentation and develops flavour, plus a cold dough is much easier to score.
6. Preheat the oven (45 to 60 minutes)
Set your oven to 250°C (480°F) with a Dutch oven (a heavy lidded pot) inside. The pot needs to be properly hot before you bake in it.
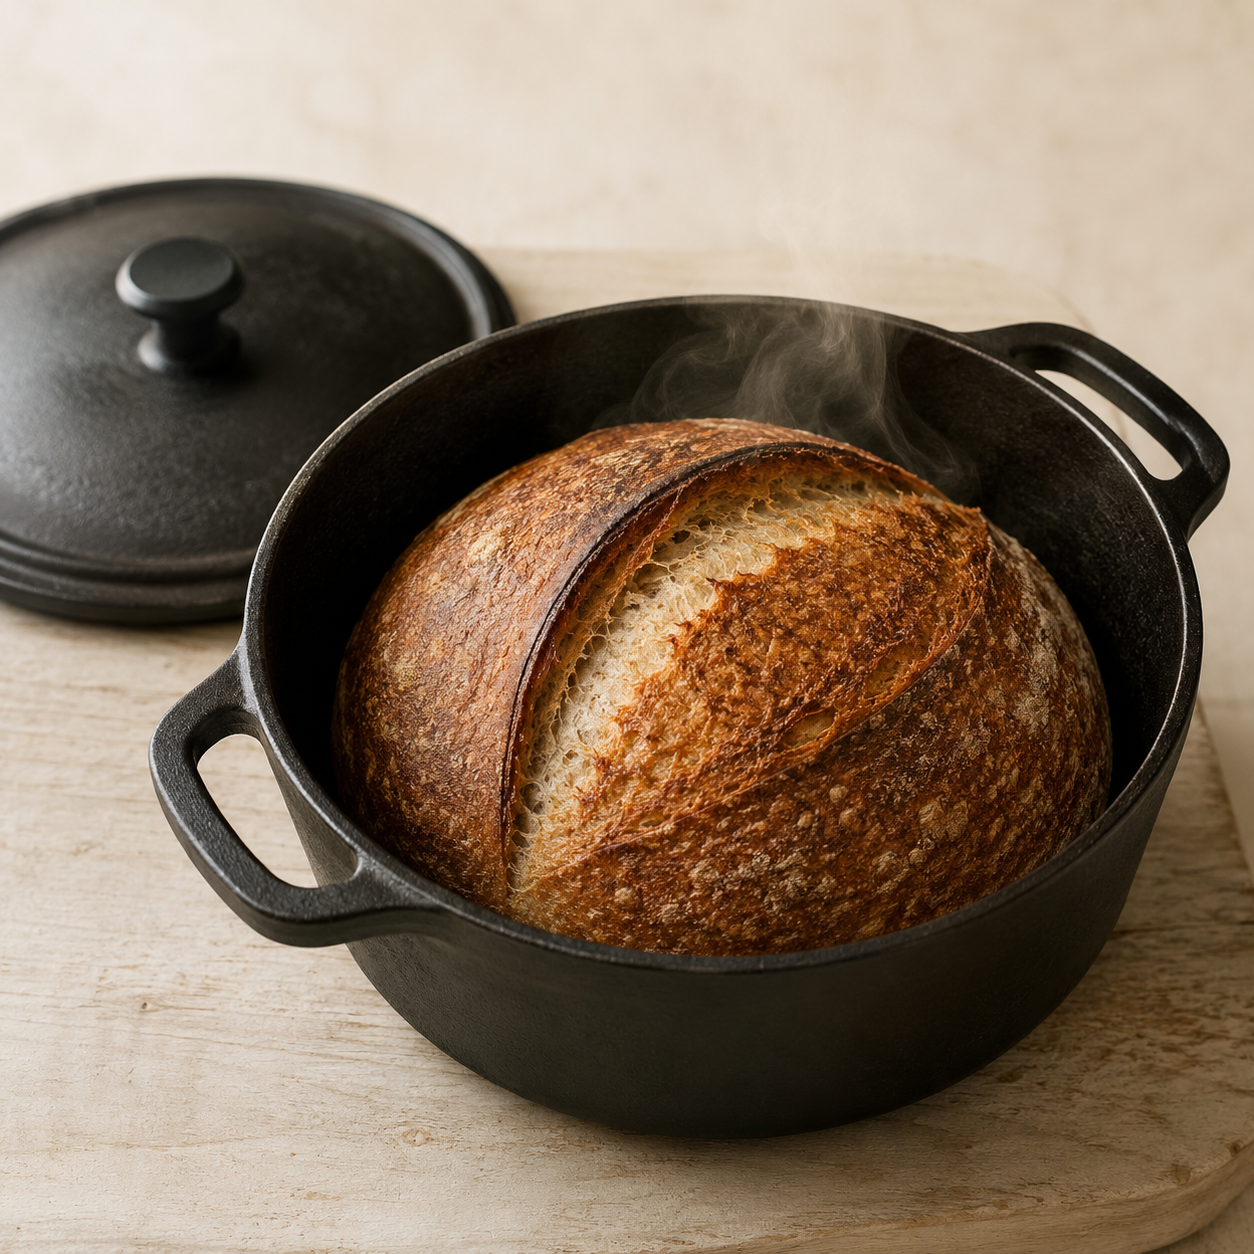
7. Score and bake (45 minutes)
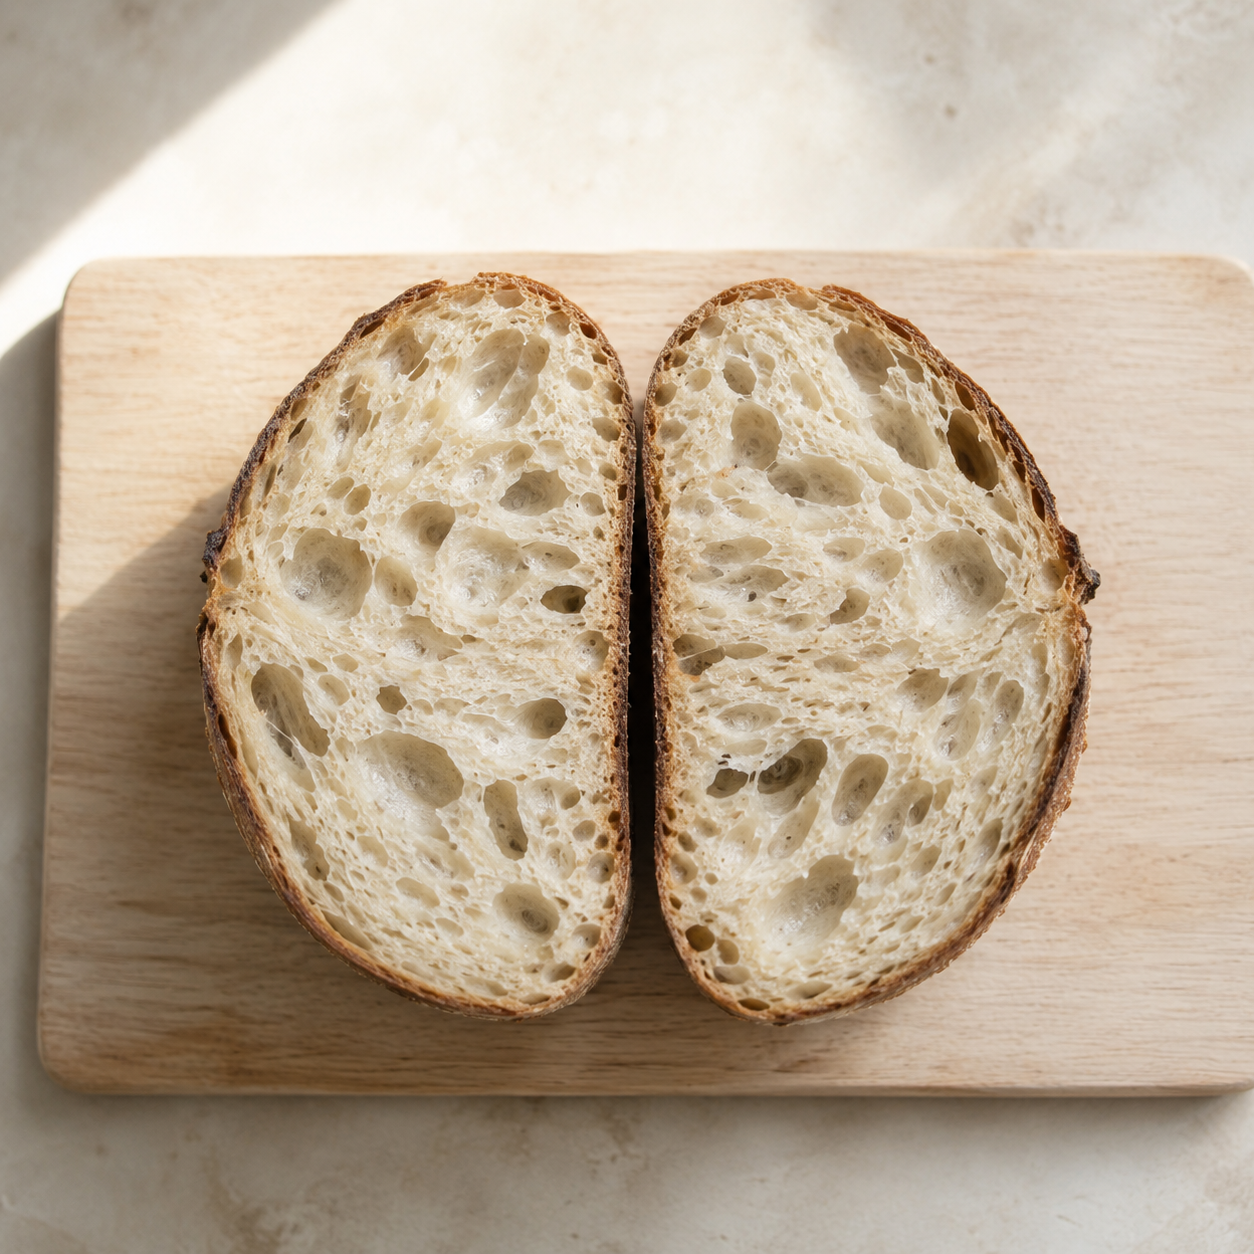
Take the dough out of the fridge. Tip it onto a piece of baking paper. Score the top with a sharp blade: a single slash across the top works well to start. Carefully transfer paper and dough into the hot pot, put the lid on, and bake for 20 minutes covered. Remove the lid and bake another 20 to 25 minutes until the crust is deeply browned. Cool fully on a wire rack before slicing.
Common problems
- My loaf came out flat.
- Most likely under-fermented (the starter was not active enough, or bulk fermentation was too short or too cold), or over-fermented (left to bulk far too long). If the dough was very slack and would not hold a shape, it is over-fermented. If it felt firm and never really rose, it is under.
- The crust is pale and soft.
- Your oven is probably not hot enough, or the Dutch oven was not preheated long enough. The pot needs to be properly hot before you put dough in.
- The crumb is gummy and dense.
- Usually a sign of under-fermentation or slicing too soon. Always cool the loaf for at least an hour before cutting; the structure sets as it cools.
Other recipes and reading
Open the calculator to scale this recipe, change the hydration, or switch flour types.